
YES, I AM A NERD!!!
I spent all day playing around with Amazon Associates since I have recently been recommending books via my “Many Books, Little Time” link. However, I quickly discovered that it is practically impossible to post the widgets for Amazon Associates via WordPress.com or Blogger.com. I’m assuming it is far easier on WordPress.org, but the free blogs make it inconvenient. Then I discovered that most of the instructions offered online right now don’t seem to follow along with the newer layout of the modern WordPress.com and Blogger.com sites.
So, after great aggravation on my part and victory signs waved about after success, here is how I managed to add the links to my own pages.
P.S. I still haven’t figured out how to do a slideshow or anything like that. This is just how to post the image + a link which triggers your tracker ID on Amazon Associates. It might look like a lot of work, but most of it you already know how to do probably (i.e. starting a new post or editing an existing post on WordPress.com or copying and pasting). Plus, I simplified all the steps out as clearly as possible, which makes it look like more steps than it actually is.
NOTE THAT THE SAME TRICK WORKS FOR BLOGGER.COM, I’M JUST RUNNING THROUGH IT AS THOUGH FROM A WORDPRESS.COM SITE.
♦♦♦♦♦♦♦♦♦♦♦♦♦♦♦♦♦♦♦♦♦♦♦♦♦♦♦♦♦♦♦♦♦♦♦♦♦♦♦♦♦♦♦♦♦♦♦♦♦♦♦♦♦♦♦♦♦♦♦♦♦♦♦♦♦♦♦♦♦♦♦♦♦♦♦♦♦♦♦♦♦♦♦♦♦♦♦♦♦♦♦♦♦♦♦♦♦♦♦♦♦♦♦♦♦♦♦♦♦♦♦♦♦♦♦♦♦- Start your WordPress.com post (or go to edit page view for existing posts).
- On the right side of your header bar (that consisting of the Bold, Italics, Bullet Points buttons) you will see two buttons. One says “Visual” and the other says “Text.” Click on “Text.”
- On the post, click your cursor wherever you want the image to be –If you are not working with a blank post and you don’t really understand html code, just put the cursor at the very beginning of the post.
Now on to the Amazon side of things. (note that if I have you clicking on a button or link, it will be marked in Green font.
- Open up a new webpage or browser tab so that you can go to the Amazon site without leaving your new post.
- Make an Amazon Associates account. (Duh 😛 ) Link is: Amazon Associates.
- On the home page of Amazon Associates, click the tab for “Links and Banners.”
- It will give you three choices: 1) Product Links, 2) Banners, and 3) Site Stripes. Click “Add Product Links now.”
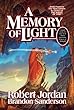
- This will pull up a search page where you locate the product. For example, I searched for Robert Jordan’s newest book “A Memory of Light.” You can also search for ISBN numbers, authors, etc. Just find your product via this page.
- On the far right side of the page, beside the name of your product, you will see a button called “Get Link.” Click it.
- On this page, there are four tabs: 1) Text and Image; 2) Text Only; 3) Image Only; and 4) Add to Widget. Click on “Image Only.”
- This page will have four boxes labeled 1) Customize Link; 2)Preview; 3) Get HTML Code for this Product Link; and 4)Add Product Reviews Script. Only boxes 2 and 3 will be important. Under box 2, “Preview,” right-click on the image of the product.
- You should have a bunch of options pop up including “Copy image URL.” Click “Copy Image URL.” If you were to see the url, it would look something like this: https://images-na.ssl-images-amazon.com/images/I/51%2BPoCSDgVL._SL110_.jpg.
- Now move on to box 3, Get HTML Code for this Product Link.
The HTML code is going to look something like this (sample came from the above mentioned book):<img border=”0″ src=“http://ws.assoc-amazon.com/widgets/q?_encoding=UTF8&Format=_SL110_&ASIN=0765325950&MarketPlace=US&ID=AsinImage&WS=1&tag=deceptblonde-20&ServiceVersion=20070822” ><img src=”http://www.assoc-amazon.com/e/ir?t=deceptblonde-20&l=as2&o=1&a=0765325950″ width=”1″ height=”1″ border=”0″ alt=”” style=”border:none !important; margin:0px !important;” />
- I know, this looks confusing if you are unfamiliar with code, but don’t worry you won’t be doing much with it. Note the part I bolded and italicized!!!! This is important!! In the third box on the page, you will highlight this part of the code. It looks the same for every product. It comes after <img border-“o” src= and it will be bracketed by quotation marks. DO NOT CHANGE ANYTHING AFTER <img src=. . . this WILL NOT WORK.
- Leave out the quotation marks from your highlighting, those have to stay the same.
- Now, with that part highlighted, either hit Ctrl + V or right-click and hit “paste.” This will paste the product image’s url into the html code. Now, the finished product will look like that below. Note that the BOLDED and ITALICIZED section is the image url pasted into the html code. Nothing else has changed.<img border=”0″ src=”https://images-na.ssl-images-amazon.com/images/I/51%2BPoCSDgVL._SL110_.jpg” ><img src=”http://www.assoc-amazon.com/e/ir?t=deceptblonde-20&l=as2&o=1&a=0765325950″ width=”1″ height=”1″ border=”0″ alt=”” style=”border:none !important; margin:0px !important;” />
- Highlight all of the code in box 3
- Right-click and hit “Copy.”
Now back to your WordPress.com post
- Go back to the wordpress.com post you were working with.
- Right-click and Paste the code into the post where your cursor is.
- Hit update or publish, whichever updates the post for publication.
- Voila!!! Your fully integrated, fully-connected Amazon Associates link on a WordPress.com post. See below the link I was working with in this article. 🙂


it is very interesting and risolutive. thanks
An impressive share! I have just forwarded this onto a colleague who
has been doing a little research on this. And he in fact bought
me breakfast simply because I discovered it for him… lol.
So allow me to reword this…. Thank YOU for the meal!!
But yeah, thanks for spending some time to
discuss this matter here on your site.
It’s nearly impossible to find experienced people on this subject, however,
you sound like you know what you’re talking about!
Thanks
I wanted to put you a very little note just
to say thank you as before just for the great guidelines you’ve
provided on this page.
Thank you thank you thank you! I was having so much trouble with this.
Excellent way of explaining, and good article to obtain information about my presentation focus, which i am going to deliver
in university.