
Pinterest is currently changing over to a new interface, and, while there aren’t any too serious changes, some things are slightly different. I’ve been playing around with the new format and thought I’d run over some of the changes here. So here are a few notations on the changes to your account home page and directions on adding or altering boards and pins.
The New Account Home Page
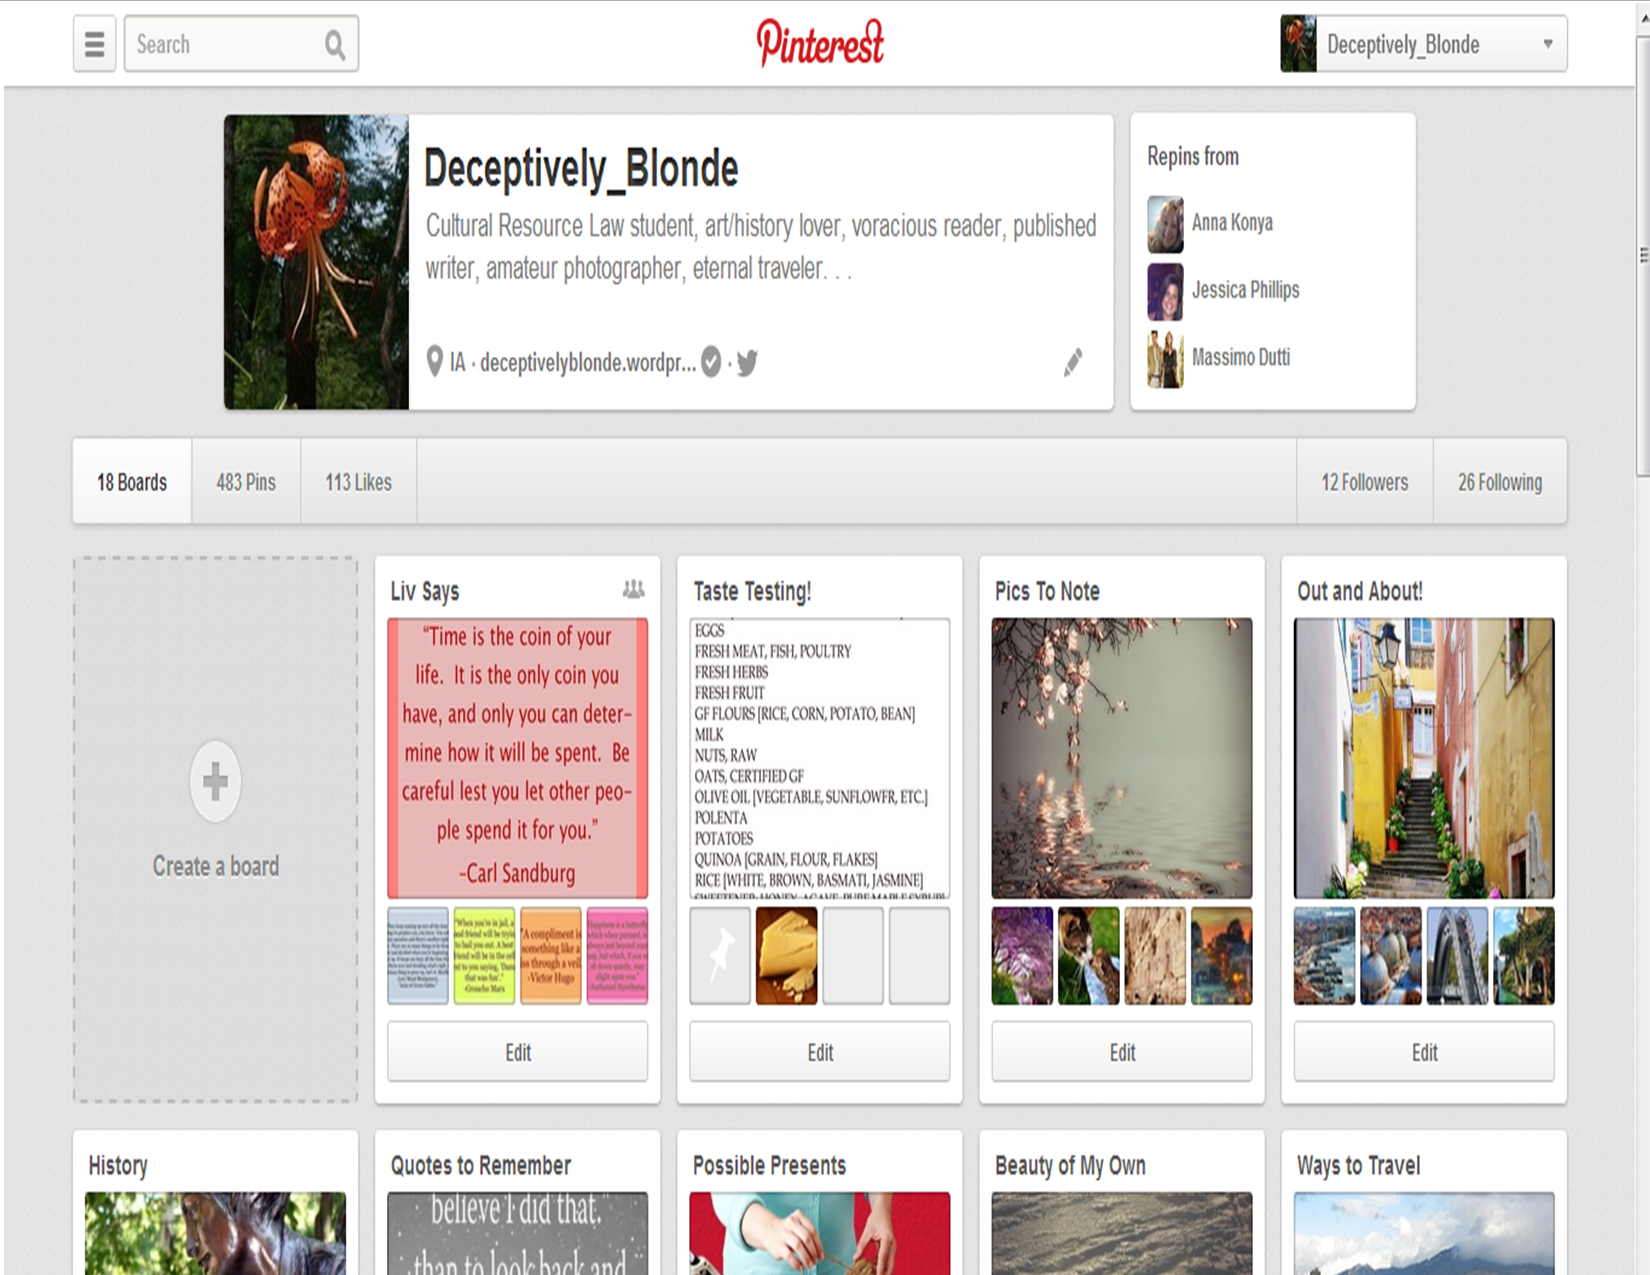
Pinterest Account Home Page = new format
If you look carefully, you will note that all the buttons on the top menu are now combined into one new drop-down menu in the upper right-hand corner. You can also easily add boards from this page, and you can still access all of your old boards from here. The menu change is really the biggest alteration on this portion.
Drop-Down Menu
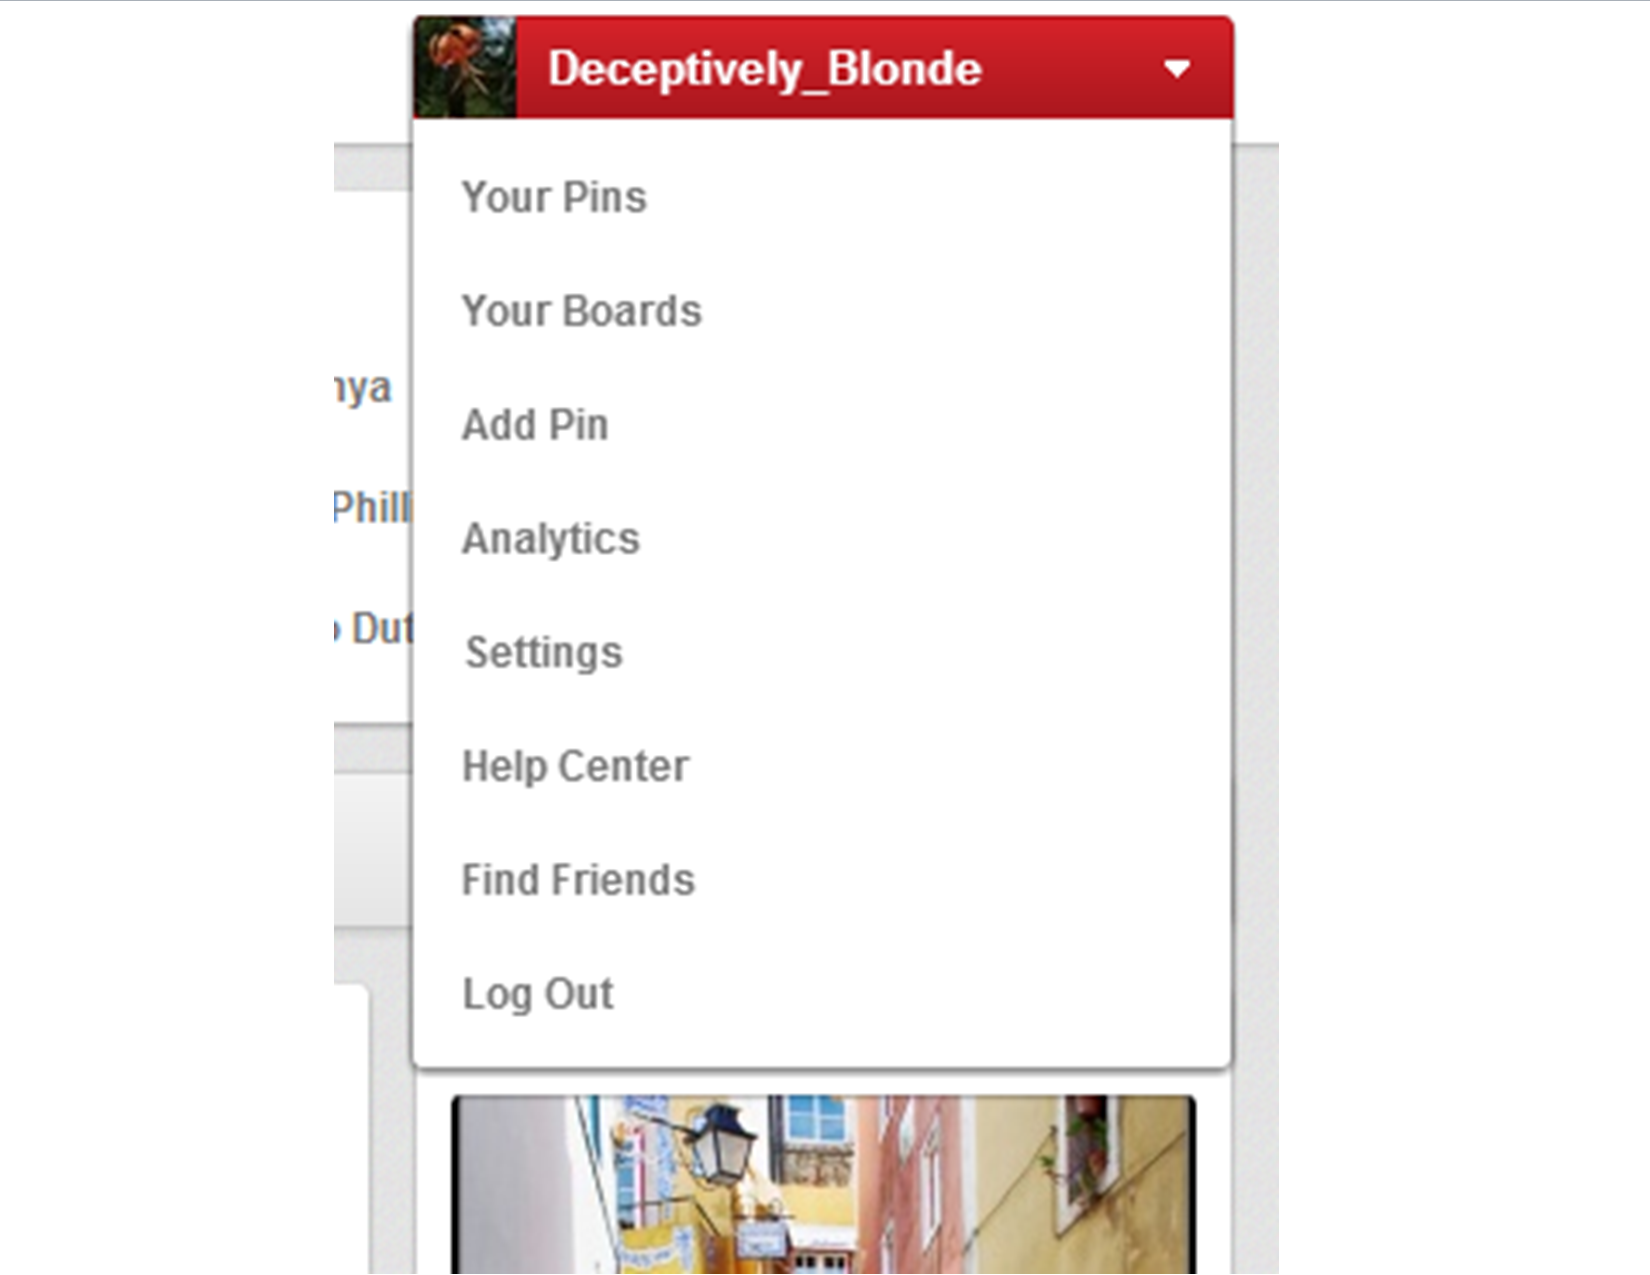
Pinterest Account Drop-down Menu Box
The drop down menu is the biggest and most important change to take note of. You will use these links to go to, add, and edit all your pins and likes. I’ll go over a few of the basic tools below. You will also access the new Analytics service here. Most of your tools are available here.
Adding Boards
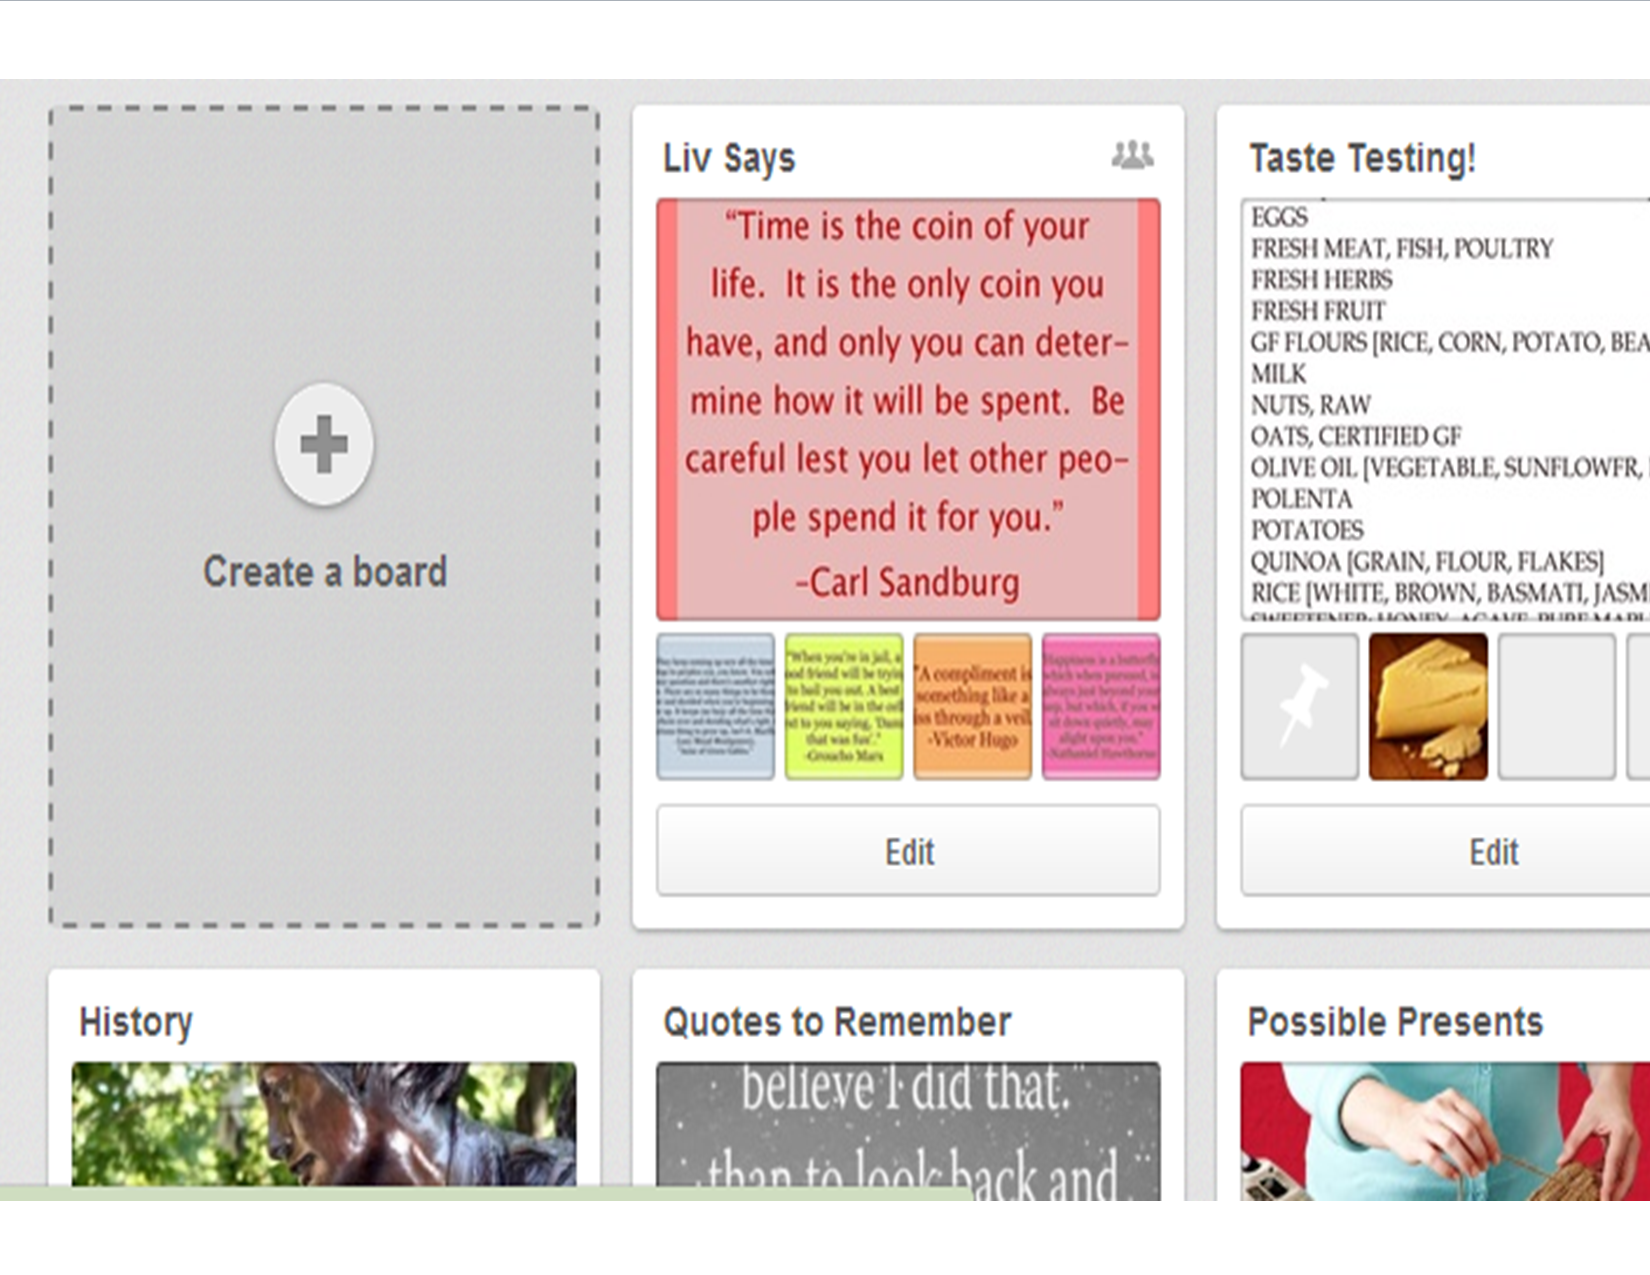
Here are where you access your current boards and add new ones
You can easily add a new board to your account by going to your Pinterest Account Home Page or by clicking “Your Boards” in your profile drop-down menu. There you will see a list of your current boards. You can see above the grey box that says “Create a board.” The process here is the same as it was in the old format–you add the name, description, category, and whether or not it is a “secret board.”
Adding Pins
There are 3 ways to add a pin.
“Your Pins”

The “Your Pins” page
1. Go to the drop down menu and choose “Your Pins.”
2. Click the + in the grey box that says “Add a pin.” This will take you to the Add a Pin Tool.
Via a Board

Go to one of your Boards.
1. Go to the drop down menu and choose “Your Boards.”
2. Pick the board you want to add the pin to.
3. Click the “Add a Pin” box with the + symbol above the text. This will take you to the “Add a Pin” Tool
Straight to the “Add a Pin” Tool

This is the new “Add a Pin” box. Note that you can add one by entering the URL!
1. Go to the Drop Down Menu and pick “Add a Pin”
2. Add your pin by uploading a photo or entering a URL.
3. Enter the name and description, click “Pin it.”
This part is a little odd because it won’t take you straight to your pin. You have to go back to the drop down menu and pick “Your Pins.”
Adding a Link/URL or Editing Your Pin
The process for adding a link or URL/editing your pin is mostly the same as I noted here in a previous post, although the format looks a little different. However, please note that you cannot edit the image from the pin when it is open. You have to hold your mouse over the pin on the “Your Pins” or the Board’s page and click “edit.” The pin itself, when pulled up won’t have the edit button.
I’ll add a separate post over the next couple of days for:
- Deactivating Your Pinterest Account.
- Changes to the Pins Themselves.
- Pinterest Analytics


One Response to “Changes in the New Pinterest: The Basics”