你好!
How to Type in Pinyin Chinese on Windows 7
You can enlarge the images by clicking on them
- Go to your Windows “Start” button on the task bar at the bottom of your screen.


- In the “Control Panel“
- If your panel is sorted by “Category” (looks like the picture below), click “Change keyboards or other input methods”. This will automatically take you to the “Keyboards” window.

- If your panel is sorted by “small icons” or “large icons” (looks like the picture below), click “Region and Language”

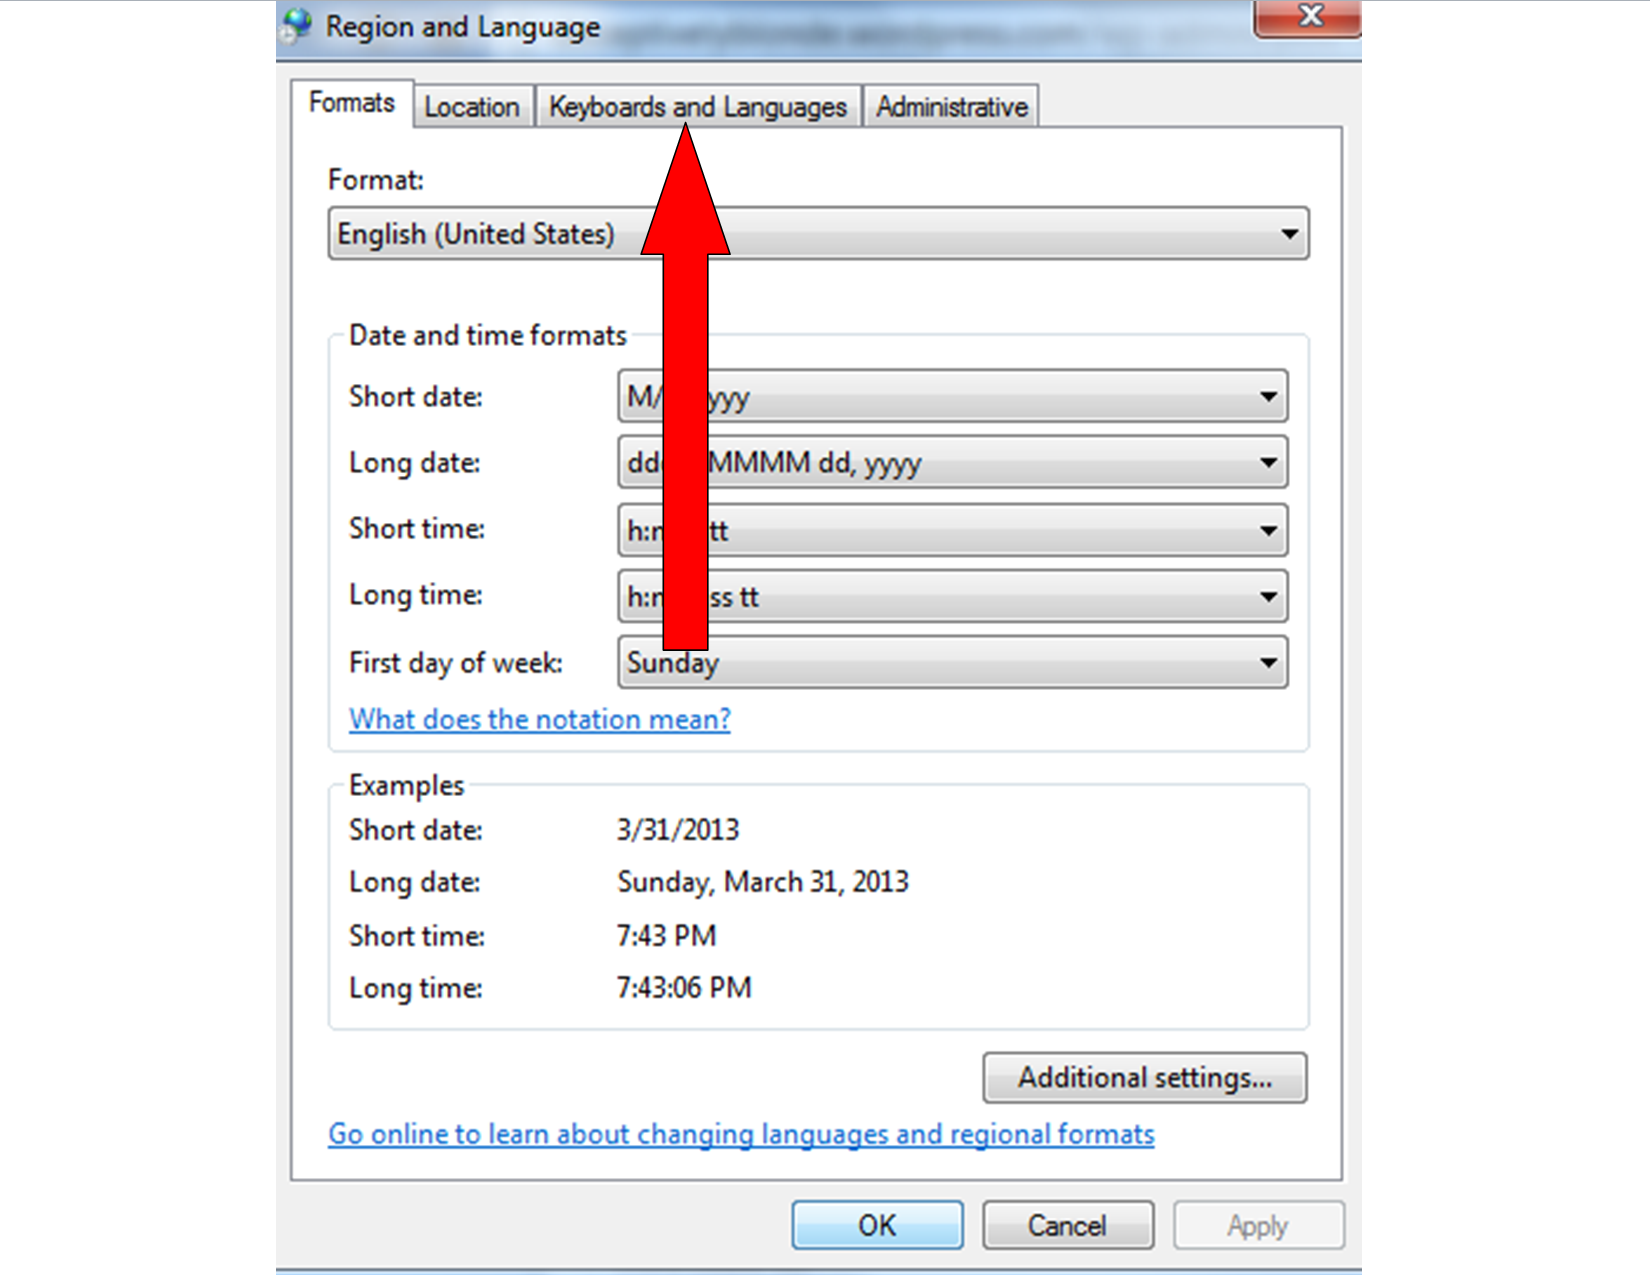
- This will take you to a new box, where you need to click the “Keyboard and Languages” tab at the top (see picture below)

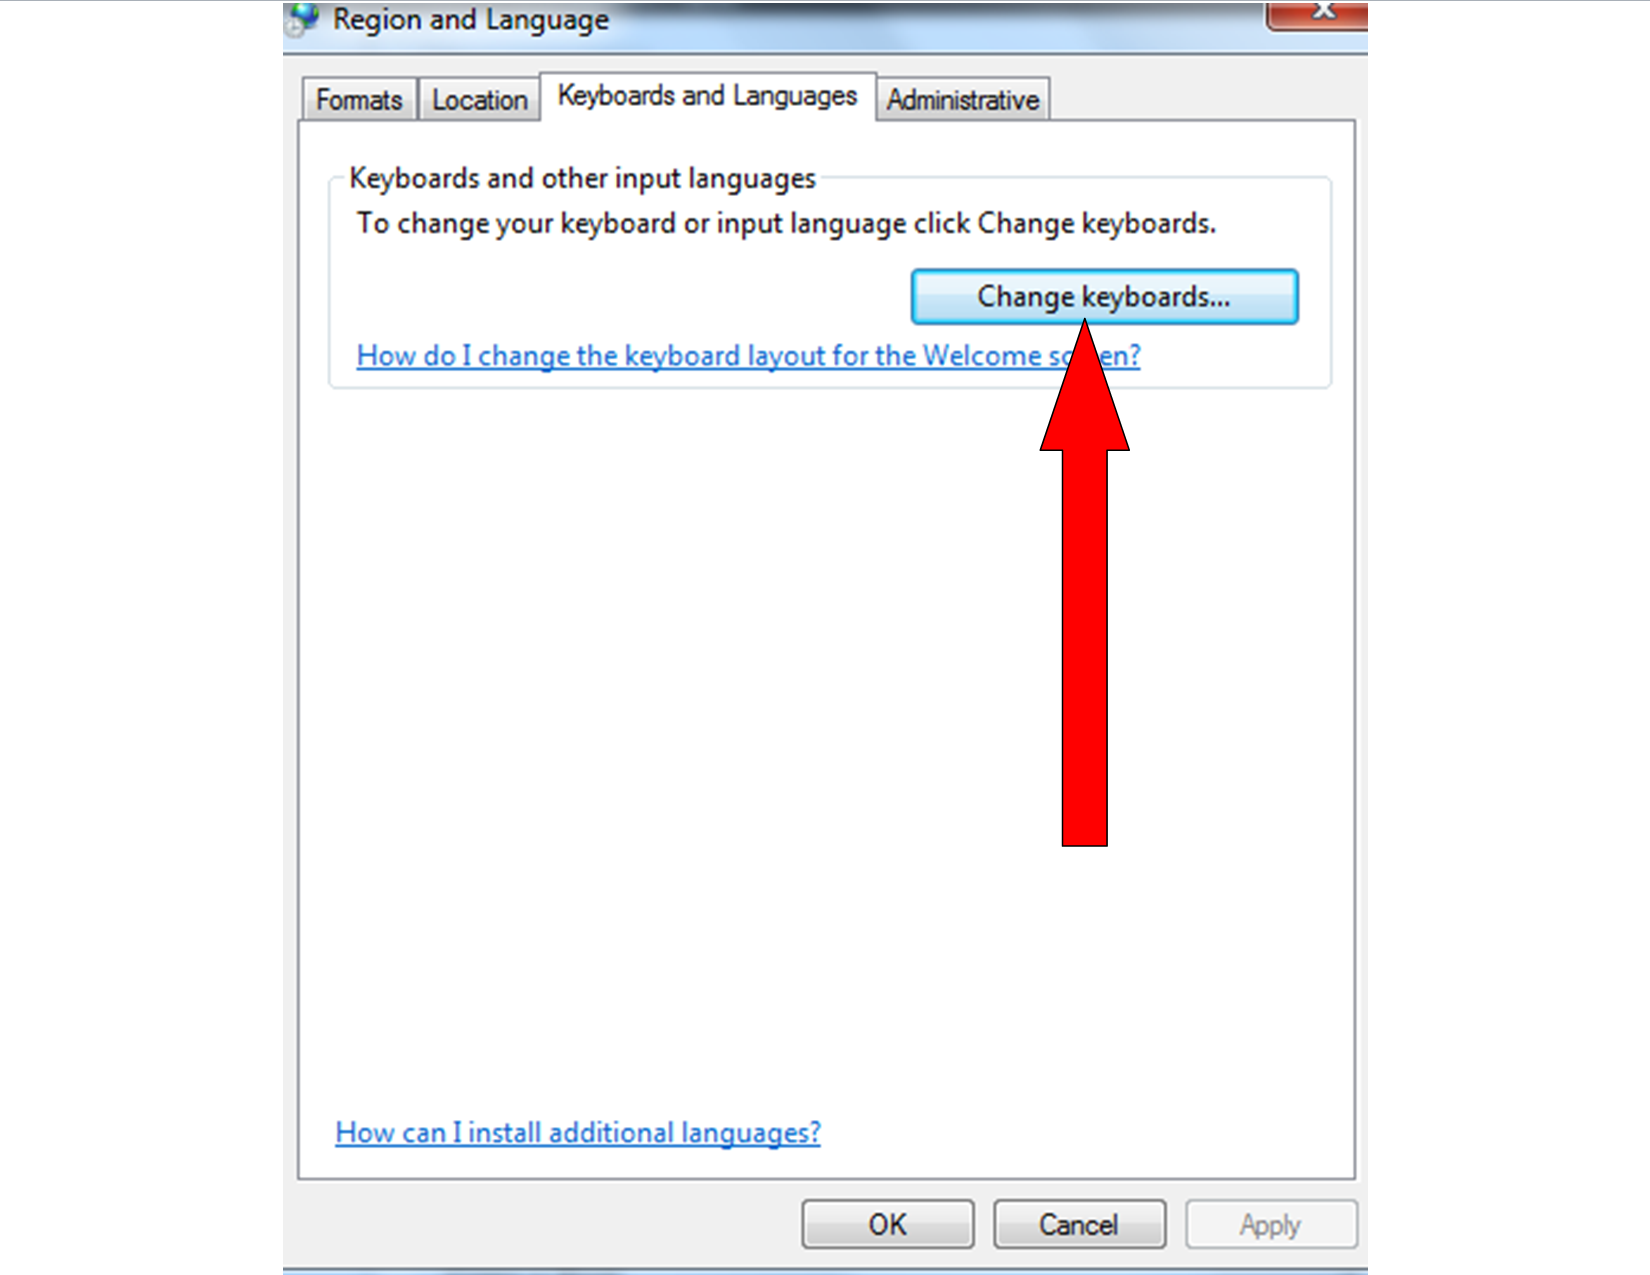
- In the “Keyboards” window, click “Change Keyboard“

- Now, click “Add” on the page that opens up.

-
ULTIMATELY YOU’LL GET TO THIS PAGE:

Simplified Chinese
- Search through the list and find “Chinese (Simplified, PRC)“
- Click the “+” sign next to it.
- Click the “+” sign next to “Keyboard”
- Check the box next to “Chinese Simplified QuanPin (Version 6.0)“

- Click “OK” on the Right side.
- Click “Apply“
- Click “OK“
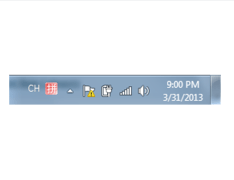
- Now look at the task bar on the bottom of your screen. Note the “EN” there.

- Click the “EN” and you’ll see some options pop-up

- Click the “CH“ option. Now your task bar will look like this:
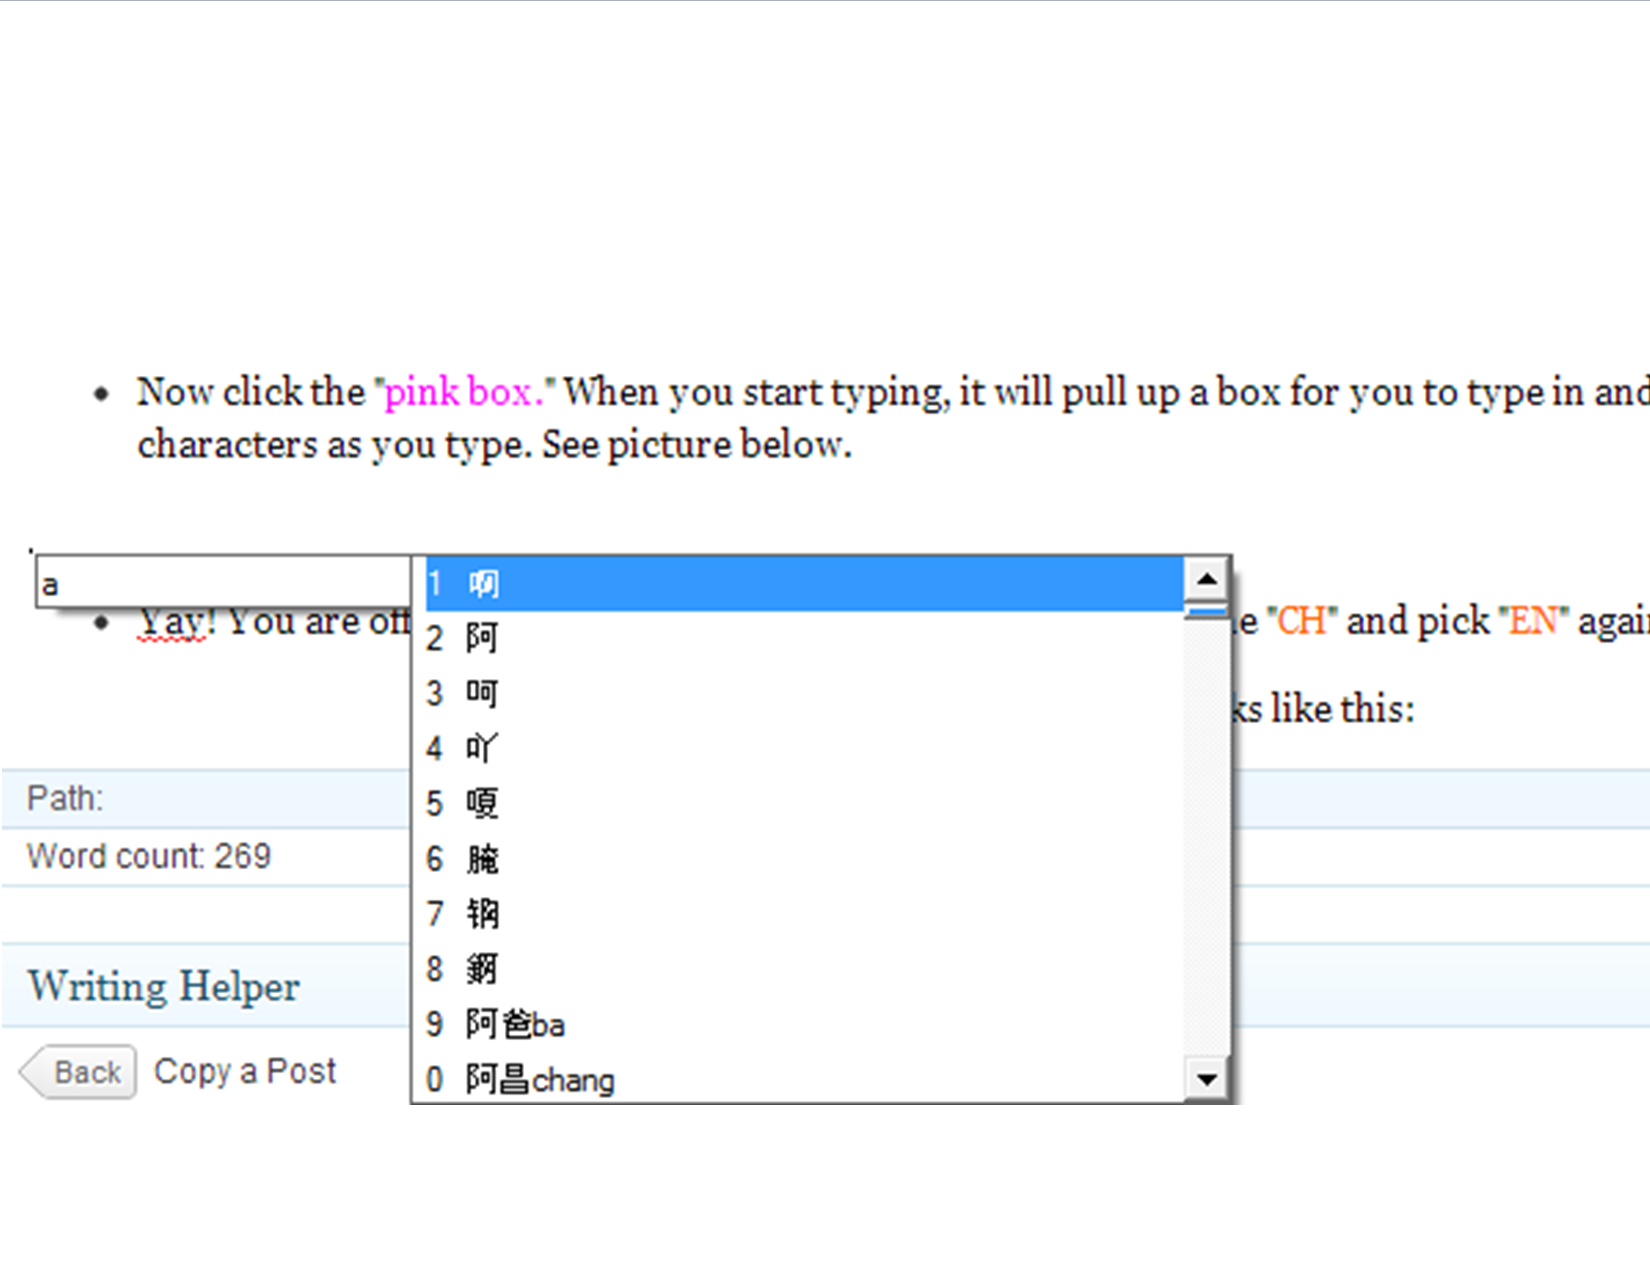
- Now click the “pink box.” When you start typing, it will pull up a box for you to type in and it will keep pulling up the Chinese characters as you type. See picture below.

- Yay! You are officially typing in Chinese characters. Note though that you have to type in Pinyin characters. Find out the English translated version of the words and type in the syllable. It will pull up the Chinese version of that syllable. Then do the next syllable. So for Hello (Ni Hao), you would type in “Ni”, it will find “倪,” and you type in “hao” and it will find “好.” You do have to be pretty familiar with the Chinese characters though to do this.
-
- To return to English, just click the “CH” and pick “EN” again.
Tags: Chinese, computer, korean letters, pinyin, type, windows 7


Leave a comment