Tag Archives: how to

How to use Adobe Signature

24 Sep

This is a brief tutorial on how to use Adobe Reader’s ‘Signature’ tool.

Step 1 Open the PDF you want to sign.

I started with a blank page to make it easier to see.
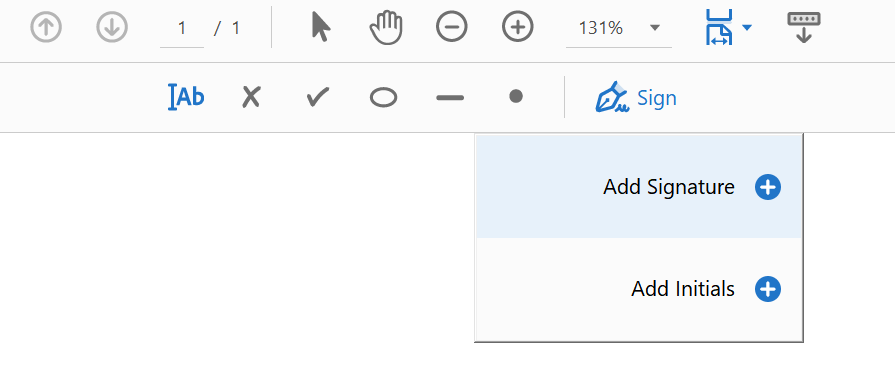
Ignore the Microeconomics textbook open in the corner 😂

Step 2 Click the ‘ink quill’ symbol on the far right side of the toolbar

It looks like this when opened:

Step 3 Click Add Signature

If it doesn’t automatically appear, click the blue ink quill + ‘sign’ symbol.

Step 4 Enter your Signature

You have multiple choices on how to input a signature. You can

  • 1) Type it and the computer will use a ‘signature font’
  • 2) Hand write it if you have a pen and touchscreen — most authentic
  • 3) Input an image of your signature

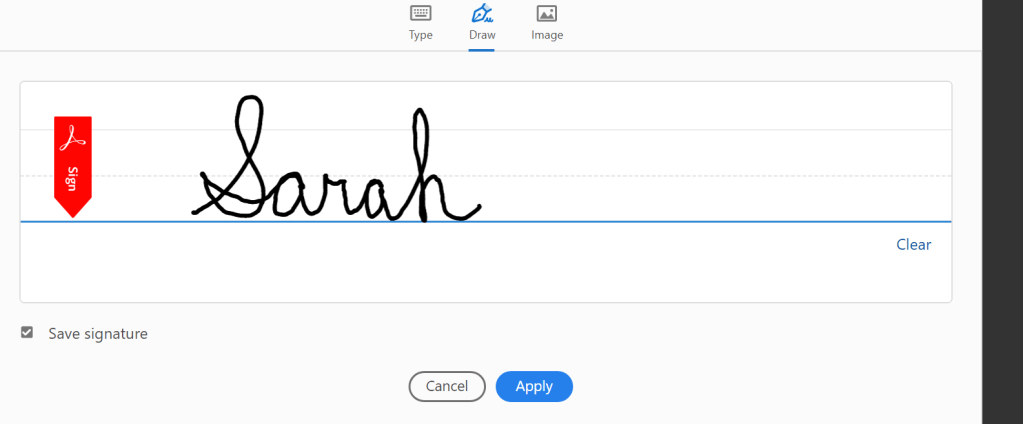
If you don’t like the signature font when typing, click the ‘style’ button and choose a different font.
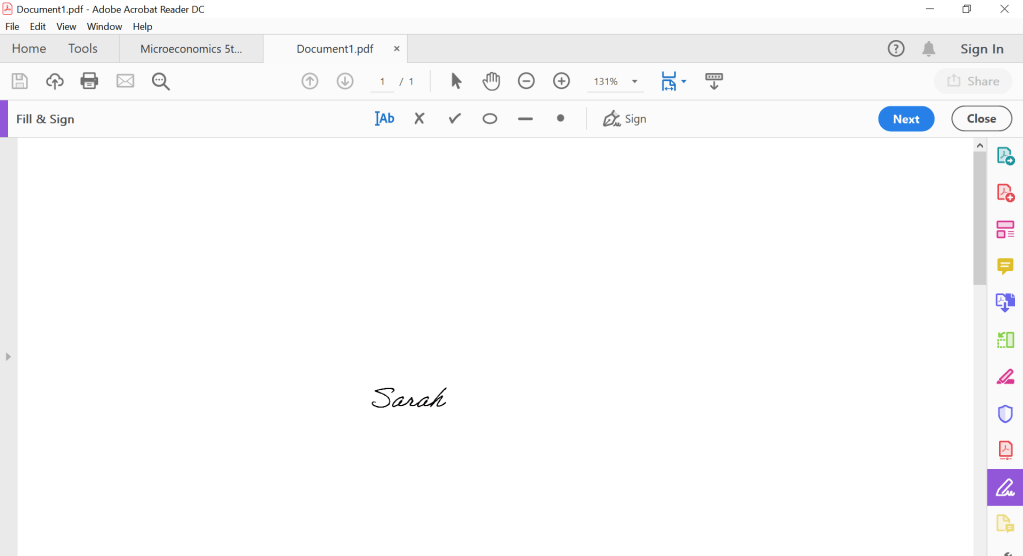
Step 5Click ‘Applyand move the signature wherever you want it on the screen.

If you have a line you need to put it on, just drag it over there using your mouse.

Step 6 Save as a new PDF

You’re done! Signed and ready to email.

Excel 101 ~ How to add a Drop-Down Menu

7 Feb

  1. Select the ‘cells’ or boxes you want to have the drop-down box appear on. You can pick specific cells or an entire row or column. 🙂

2. Visit the ‘Data‘ tab on the top

3. Choose the small ‘icon with the check mark under ‘Data Tools’

4. Choose ‘Data Validation

5. Where it says ‘Allow’ – choose ‘‘List’

6. In the box ‘Source’ type in your options separated by a comma (,).

7. Select OK and it’ll appear!


Installing #WordPress Site on #HostGator

21 Apr

How to Install and Start Editing your WordPress Site on Hostgator!!

STEP #1 – Sign Into your CONTROL PANEL.  If you aren’t sure how, look here.

WP 1

See the button in the picture above that says “WordPress – 1 Click Installation?”  Click it 🙂

WP 2

Click the down arrow and choose the domain name (URL: http://www.deceptivelyblonde.com) that you have created on HostGator and was to set up as a WordPress Site. Click “Next”

WP 3

Fill in your Name and information for the WordPress Site.  Be careful – if the email address you use already has a WordPress Site attached to it, they’ll want to add this site to your old WordPress account. If you don’t want to do that, you’ll have to create a new WordPress account.

WP 4

You’re installing!  Wait, Wait, Wait!

WP 5

Awesome! Your Installation is Complete.  Pay attention to the “Installed to:” “Username” and “Password” — You’ll need these next.

Take that “Installed To:” URL and put it in your URL field at the top of your browser. It should be the url you chose for your website.  Basically, just go visit your new site. It’ll show the image below:

For example: “https://www.deceptivelyblonde.com”

wP 6

This is the page that everyone else is going to see until you finally publish your completed site.  But for now, just click “Admin Login.”  In the picture below, enter the username and password that they gave you before.    

WP 7

Viola!  You’ll be on the familiar “WordPress” dashboard instead of the Hostgator dashboard.  Now you can go through the steps and start setting up your website.  (I’ll post another instruction set for that later. 🙂

WP 8

How Many Times Have You Been Shared on Facebook?

9 Jun

If you are interested in finding out how many times your website (or any website) has been shared or drawn comments on Facebook, it’s simple.  

Just type http://graph.facebook.com/yoursiteaddress into the URL bar on your browser.  It will then tell you how many times that page has been shared and how many comments have been posted.

Replace “yoursiteaddress” with the exact url (Http:// and www. included) of whatever page you want to look up. NOTE: If you add in www. where there isn’t one or remove www. where there is one, the results will change.

For example,

http://graph.facebook.com/http://www.yahoo.com

looks like:

Facebook

Whereas, one of my posts on Students Ramblings appears like this:

fb2


Change Your Typing Language in Windows 8

19 Feb

Finding MPRE Scores

3 Dec

 MPRE scores are posted if you took the test Nov. 2013! Meaning I just spent 45 minutes trying to figure out where they were going to show up.  Now that I have located it, I thought I’d share the directions in case anyone else was having the same problem. 🙂  CLICK IMAGES TO ENLARGE.

METHOD 1 = Easiest Method

  • Click THIS Direct Link to Your File Cabinet on the NCBEX/MPRE Site.
  • Log in when it asks. This will take you to the File Cabinet; all you have to do is click the “MPRE Score” link and it will show you the scaled score.

File Cabinet

METHOD 2 = Just in Case

  • Go to the NCBEX website.

NCBEX

  • There are two ways to go about this. 
    • Click “Score Services” on the Main page shown above (light blue button under “NCBE Account”
    • Click “Log in” from the top right of the Main Screen shown above.
  • Either one will take you to the NCBE account log-in page. There you need to sign in with your email address and password.
  • Now you are going to be on your account (Score Services takes you to Score Services; Log in goes to Account Home). Doesn’t matter which page you’re on, it’ll still have the same menu on the top. This menu is what you’re looking for.

NCBE Main

  • On the menu at the top of this page, the far right option will be “File Cabinet.” Click that.

Menu Bar

  • Voila! Now you just click on the “MPRE Score” link, and you’ll see your scaled score!

File Cabinet

MPRE SCORE PAGE

Looks like this. You need the “Scaled Score.”  Now go check out the State MPRE Requirements to see where your score is sufficient to meet their laws. You need at least a 75, usually higher, for all but Puerto Rico, Maryland, and Wisconsin.

MPRE Score Page

Video

How to Add a Link to your Pinterest Pins

4 Feb

So, this may have been obvious to other people, but it took me a little while to pick up how this worked. So I thought I would share the process!

Sorry for the video quality!

%d bloggers like this: